Difference between revisions of "Manual:Geyser"
m (moved Manual:Geyser to Mudlet:Geyser: Moving temporarily until the manual namespace is created.) |
m (moved Mudlet:Geyser to Manual:Geyser: Moving to namespace Manual which no exists.) |
(No difference)
| |
Revision as of 01:14, 16 January 2012
The Geyser Layout Manager
(Some Texts, mostly those in the Introduction and Windows section, are taken from guy's pdf)
Introduction
Geyser is an object oriented framework for creating, updating and organizing GUI elements
within Mudlet.
Motivation
Mudlet makes the creation of label, miniconsoles and gauges a quick and easy thing. Mudlet provides a nice signal when window resize events happen. Mudlet does not provide a good framework for complex window management, which Geyser attempts to address. The name Geyser was partly chosen to go with Crucible...sort of like if you were to pour some window glass into a hot crucible it might shoot up or something.
Main Geyser Features
Geyser is based on traditional GUI concepts and should feel similar to using Java's Swing. The biggest difference is in how positions are specified.
- All window positions are specified relative to their container - nothing new there. However, window positions can also take on percentages and negative pixel and character values. For instance, a window could be constrained to have a height of 50% of its container and a width such that the window's right edge is always 20 characters from its container's right edge. See examples below and the demos/tests that come with Geyser.
- All windows under Geyser control are automatically resized as necessary when the main Mudlet window is resized. Once you create a window and assign it to a container, you never have to worry about positioning it again. Nonetheless, it's very easy to shift the container that a window is in, maintaining its constraints so that it resizes as needed according to the dimensions of the new container.
- Due to the container hierarchy, hiding a container window automatically hides all its contained windows too. The same for show. With clever construction and labels with callbacks, this lets one make complex GUI elements that are minimizable or maximizable or ...
- However, there is always some overhead for automation systems and Geyser is no exception. Fortunately, most of the overhead is during window creation and resize events - not things that happen frequently.
Constraints format
Geyser position constraints are very simple. They are a string composed of a number and a format type. For example, "10px" means 10 pixels, either pixels from the origin (e.g. x or y) or a value for the width or height. A negative number indicates distance from a container's right or bottom border depending on whether is a constraint for x/width or y/height, respectively. Percentages for width and height are in terms of the container's dimensions and negative values are converted to the equivalent positive value. A 100% width subwindow with an x-coordinate of 10 will have part of itself displayed outside the confines of its container. There is no hard limit on maximum window size, just as with regular Mudlet windows. If a number, n, is passed as a constraint instead of a string, it is assumed to be equivalent to "npx". Any Lua table that contains entries for x, y, width and height in the proper format can be used for Geyser constructors and setting constraints.
The following is a valid example:
{x = "20px", y = "-10c", width = "40%", height = 30}
Windows
Container
The Container class is the root type of window. The Geyser table/namespace has the functionality of a Container and represents the main Mudlet window and control of other windows therein. Notice that because Container is the root class, that all types of Geyser windows can act as a container - labels anchored within miniconsoles anchored within gauges are possible (but not necessarily desireable).
HBox/VBox
These are special types of containers. Every window in these are horizontally or vertically aligned in the order they where added.
Added to Mudlet in 2.0-rc4
Window
Abstract class meant to be subclassed into Label and MiniConsole that contains functions common
to both
Label
Based on the primitive Mudlet label, nothing new.
MiniConsole
Based on the primitive Mudlet miniconsole, nothing new.
Gauge
This is a composite window. Gauge duplicates the functionality of the built in Mudlet gauges, but in a clean and easily extended way. Internally, a Geyser Gauge is a container holding two Labels, front and back, which are initially scaled to fill the entire Gauge container. Hence, a gauge, g, can be given callbacks with the g.front:setClickCallback() method.
The backgroundColor parameter initially sets the colors of the gauge, but of course the front and back components can be accessed individually as labels for high control over their looks. Gauges can be horizontal or vertical and decrease in value left to right, right to left, down up or up down depending on the value of the orientation parameter.
Tutorial
Note: This tutorial assumes you know how scripts in mudlet work. If not then you should look at the manual first. Also it only shows how Geyser basically works and explains Geysers special windows. It wont go into detail about the windows that where already in Mudlet.
Hello World
Let's start with something simple. A Label.
Geyser.Label:new({
	name="HelloWorld",
	x=50, y=50,
	width=200, height=50,
})
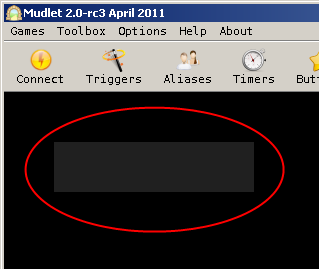
This code creates a blank Label with a size of 200x50 at a position of 50 points horizontal and vertical from its parent window - which is the main window since we didn't specify any.
You can manipulate the Label through the normal functions but Geyser.Label:new() returns an object which can be used to manipulate the label directly. So you should store it:
local HelloWorld = Geyser.Label:new({...
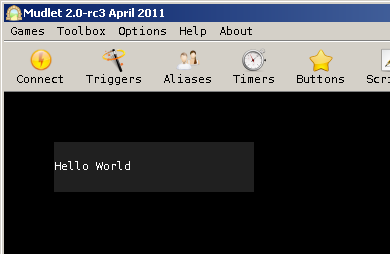
Then you can, for example print a text on it:
HelloWorld:echo("Hello World")
You can put a format parameter so that the text is, for example, centered.
HelloWorld:echo("Hello World", nil, "c")
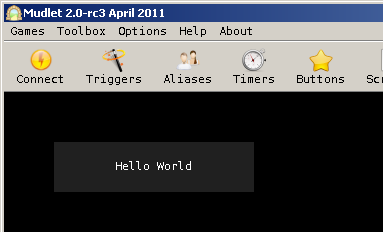
The second parameter is the color. We set it to nil which means the labels foreground color will be used.
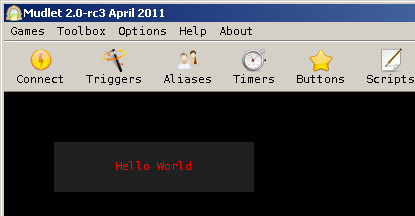
The color parameter either accepts a string ("red"), a hex value("#FF0000" or "0xFF0000" or "|cFF0000"), or a decimal value "<255,0,0>"
Example:
HelloWorld:echo("Hello World", "red", "c")
Note:
This will automatically set the foreground color, so any echo, without the color parameter set, after that will use the same color.
You can also set the foreground color with the setFgColor method:
HelloWorld:setFgColor("red")
HelloWorld:echo("Hello World", nil, "c")
Containers
Containers are windows that can contain other windows. Actually, since all other Geyser windows subclass container, every window can do that. But containers do not have any visible content by themselves.
Let's show that by an example:
local container = Geyser.Container:new({
	name="container",
	x=50, y=50,
	width=250, height=50,
	})
This will create a container, but if you look at the screen you will see nothing at the positon.
There is a way to make containers visible though:
container:flash()
This will flash the container for a short period of time.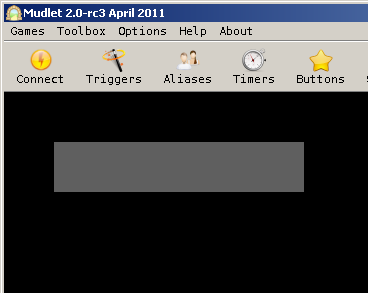
flash() accepts a number as paremeter which defines the time, in seconds, the flash is shown.
Now, that the container is created, you can add other windows to it. There are 2 ways:
Directly when creating the window
local container_label = Geyser.Label:new({
	name="container_label",
	x=0, y=0,
	width="100%", height="100%",
	},
	container)
container_label:echo("This is a label in a container", nil, "c")
Later, after the window was created
local container_label = Geyser.Label:new({
	name="container_label",
	x=0, y=0,
	width="100%", height="100%",
	})
container_label:echo("This is a label in a container", nil, "c")
container:add(container_label)
Both will lead to the same outcome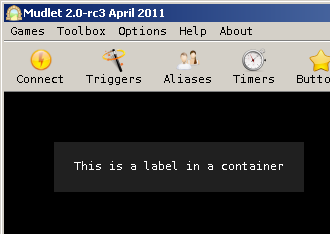
Note that we gave a width and height of "100%" to the constructor of the container. This means that the label will take 100% of the containers width and height. If values are given in percent they will even resize with its parent:
container:resize(325, nil)
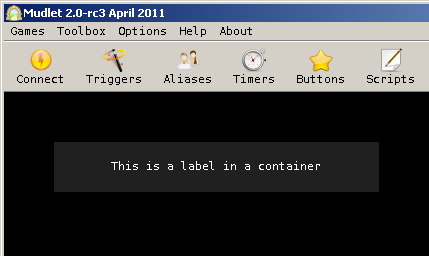
The first parameter is the width, the second the height. If the value is nil the current value is used.
As said in the "Hello World" tutorial the position is relative to its parent window. That's why we could set both x and y to 0 and it is at the position we wanted - the position of the container.
When we now move the container the label moves with it:
container:move(400, nil)

The first parameter is the x-, the second the y-position. If the value is nil the current value is used.
VBox and HBox
The VBox and HBox classes are special Containers.
They will automatically align its containing windows vertically or horizontally, respectively, in the order they where added to them.
local HBox = Geyser.HBox:new({
	name="HBox",
	x=0, y=0,
	width=400, height=30,
	})
Like containers you won't see them by themselves.
Adding children works like with containers
local label1 = Geyser.Label:new({
	name="Label1",
	},
	HBox)
label1:echo("Label 1", "black", "c")
label1:setColor(255, 0, 0)
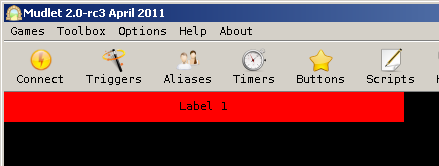
We didn't set any position or size, but the label gets the same size as the HBox.
If we add another window:
local label2 = Geyser.Label:new({
	name="Label2",
	},
	HBox)
label2:echo("Label 2", "black", "c")
label2:setColor(0, 255, 0)
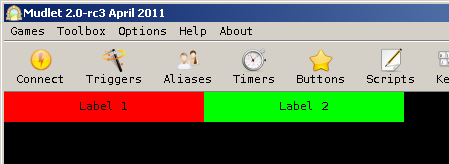
the size will be divided equally between them!
What if you want a child that takes more or less space than the others?
That's possible too:
local label3 = Geyser.Label:new({
	name="Label3",
	h_stretch_factor=2.0,
	},
	HBox)
label3:echo("Label 3", nil, "c")
label3:setColor(0, 0, 255)
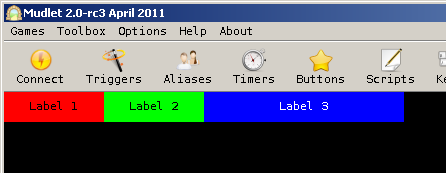
As you can see, Label 3 takes the same space as Label 1 and 2 Together.
That's because we supplied a horizontal stretch factor with "h_stretch_factor=2.0"
This works also with a vertical stretch factor, just replace "h_stretch_factor" with "v_stretch_factor"
Now you may have windows that should not be stretched at all.
To accomplish this you have to set the horizontal and/or vertical policy:
local label4 = Geyser.Label:new({
	name="Label4",
	width="13%",
	h_policy=Geyser.Fixed,
	},
	HBox)
label4:echo("Label 4", "black", "c")
label4:setColor(0, 255, 255)
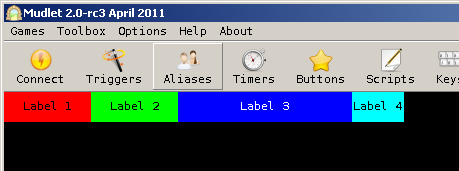
Possible values for the policies are Geyser.Fixed and Geyser.Dynamic. The default is Geyser.Dynamic.
Note that, like in the example above, the label will retain relative values (like percent) if used.
The VBox works like the HBox, only that the child windows are aligned vertically.
Nestable Labels
This is a new feature added by Chris. It is an extension of the Label class, but has a few nuances. First, within the current scope, nested labels cannot have a container, they must be their own container (ie you just don't specify a container). Second, you add the parameter nestable=true to your label creation. Lastly, it is not required, but you are advised to specify the width/height because the defaults are huge. To add additional labels under a nestable label, the addChild method exists. addChild takes the normal parameters available to a label, and inherently allows nesting. A nested label can have the option 'flyOut=true' which will make the label flyout and close with the mouse hovering over it. Note: as of October 1, 2011 this feature is only available within my repository, but it will likely be ported into the main Mudlet branch. Here is a small example:
Available options to layoutDir are the direction the window should go (R for right, L for left, T for top, B for bottom), followed by how the nested labels should be oriented (V for vertical or H for horizontal). So options are: RV, RH, LV, LH, etc...
b = Geyser.Label:new({name="testa", x=400,y=50,height=100,width=100,nestable=true, message="CLICK ME!"})
c = {}
for i=1,20 do
 c[i] = b:addChild({name="test"..tostring(i),height=30,width=60, layoutDir="BH", flyOut=true, message="test"..tostring(i)})
end
d = {}
for i=21,40 do
 d[i]=c[5]:addChild({name="test"..tostring(i),height=30,width=60, layoutDir="RV", flyOut=true, message="test"..tostring(i)})
 d[i]:setClickCallback("testFunc", d[i].name)
end
function testFunc(name)
 display(name)
end