Difference between revisions of "User talk:Akaya"
| Line 12: | Line 12: | ||
height = "10%", | height = "10%", | ||
},main)</lua> | },main)</lua> | ||
| − | #''' | + | #'''Geyser.Label:new()''' To create a label via Geyser we must use the Geyser.Label:new() function. It has two parameters: a table of label information and the container. |
| − | #''' | + | #'''Setting a variable''' Though not necessary, it is normally a wise choice to assign our label to a variable. This will allow us to refer to it later on. In our example, the variable name is set to ''myLabel''. |
#'''Name''' This is the name that Geyser will use internally to manipulate our label. It is not uncommon (and usually best) to have this match our variable name. We've done this in our example, naming it ''myLabel'' | #'''Name''' This is the name that Geyser will use internally to manipulate our label. It is not uncommon (and usually best) to have this match our variable name. We've done this in our example, naming it ''myLabel'' | ||
#'''Position''' This is where our label will reside on the screen in relavance to the main Mudlet window via x and y coordinates. 0,0 representing the top left. These coordinates can be a percentage of its container encased in quotations (a string) or a pixel value (a number). In our example, x is set to 0 (a pixel value) which will hug it to the left side of the screen. y is set to "50%" which will set it halfway down the screen. If we want to adjust the starting position of the label, we would adjust these values. | #'''Position''' This is where our label will reside on the screen in relavance to the main Mudlet window via x and y coordinates. 0,0 representing the top left. These coordinates can be a percentage of its container encased in quotations (a string) or a pixel value (a number). In our example, x is set to 0 (a pixel value) which will hug it to the left side of the screen. y is set to "50%" which will set it halfway down the screen. If we want to adjust the starting position of the label, we would adjust these values. | ||
| Line 19: | Line 19: | ||
#'''Container''' The container is the last thing to be specified during label creation. It is the second parameter of Geyser.Label:new() so you'll want to separate it from the first with a comma as shown in the above example. Since we don't really have a container made yet, we're simply placing the label in the main Mudlet window or ''main''. | #'''Container''' The container is the last thing to be specified during label creation. It is the second parameter of Geyser.Label:new() so you'll want to separate it from the first with a comma as shown in the above example. Since we don't really have a container made yet, we're simply placing the label in the main Mudlet window or ''main''. | ||
===Style a label=== | ===Style a label=== | ||
| + | [[File:Blue.png|thumb|Click to enlarge]] | ||
<lua>myLabel:setStyleSheet([[ | <lua>myLabel:setStyleSheet([[ | ||
background-color: blue; | background-color: blue; | ||
]])</lua> | ]])</lua> | ||
| − | #''' | + | #'''setStyleSheet()''' Styling a label is done using the Qt Stylesheet. Using the setStyleSheet() function we specify the properties of our label's stylesheet in a single string. The variable ''myLabel'' is prefixed so that the function knows which stylesheet its changing. Each property of the stylesheet is separated with a semicolon. There are numerous things you can do with this and a full list of features can be found here: [http://harmattan-dev.nokia.com/docs/library/html/qt4/stylesheet-reference.html] |
| − | #''' | + | #'''Stylesheet contents''' setStyleSheet() has but a single parameter: a single string containing every property of the stylesheet. This single parameter is encased with double brackets as there may be a string within a string. In our example, we have only provided a single property: background-color. Each property is separated from it's value with a colon. |
| + | ===Create a container=== | ||
==Vyzor== | ==Vyzor== | ||
Blah Vyzor Blah | Blah Vyzor Blah | ||
Revision as of 06:04, 5 September 2013
Introduction to Frameworks: Geyser and Vyzor
Frameworks can make GUI creation loads easier by providing support for common GUI-related goals. The two most commonly used in the Mudlet world are Geyser and Vyzor. Each have their own pros and cons and it is ultimately up to you as to which you choose. Vyzor is great for creating an entire GUI and sharing them with others as it handles window resizing for you. Meaning the GUI will appear the same regardless of the user's screen size. Geyser handles widgets much better than Vyzor but does not offer dynamic resizing or individual manipulation of stylesheet elements by default. In short, there is really nothing that one can do that the other cannot with a bit of work. Again, the decision is up to you.
Geyser
One of the major highlights of Geyser is that it is built into Mudlet. No installation is necessary to utilize its API. This makes sharing your work a breeze.
Create a label
<lua>myLabel = Geyser.Label:new({
 name = "myLabel",
 x = 0,
 y = "50%",
 width = 100,
 height = "10%",
},main)</lua>
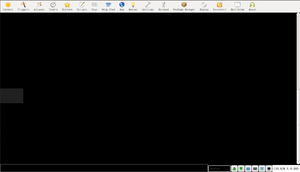
- Geyser.Label:new() To create a label via Geyser we must use the Geyser.Label:new() function. It has two parameters: a table of label information and the container.
- Setting a variable Though not necessary, it is normally a wise choice to assign our label to a variable. This will allow us to refer to it later on. In our example, the variable name is set to myLabel.
- Name This is the name that Geyser will use internally to manipulate our label. It is not uncommon (and usually best) to have this match our variable name. We've done this in our example, naming it myLabel
- Position This is where our label will reside on the screen in relavance to the main Mudlet window via x and y coordinates. 0,0 representing the top left. These coordinates can be a percentage of its container encased in quotations (a string) or a pixel value (a number). In our example, x is set to 0 (a pixel value) which will hug it to the left side of the screen. y is set to "50%" which will set it halfway down the screen. If we want to adjust the starting position of the label, we would adjust these values.
- Size This will determine the size of our label using width and height. Just like the position, this can be a percentage or pixel value. In our example, the width has been set to 100 which will make it 100px wide. The height is set to "10%" which will make it's height 10% of the main Mudlet window.
- Container The container is the last thing to be specified during label creation. It is the second parameter of Geyser.Label:new() so you'll want to separate it from the first with a comma as shown in the above example. Since we don't really have a container made yet, we're simply placing the label in the main Mudlet window or main.
Style a label
<lua>myLabel:setStyleSheet([[
background-color: blue;
]])</lua>
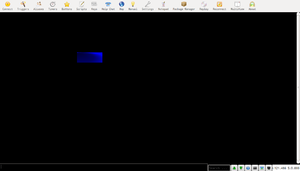
- setStyleSheet() Styling a label is done using the Qt Stylesheet. Using the setStyleSheet() function we specify the properties of our label's stylesheet in a single string. The variable myLabel is prefixed so that the function knows which stylesheet its changing. Each property of the stylesheet is separated with a semicolon. There are numerous things you can do with this and a full list of features can be found here: [1]
- Stylesheet contents setStyleSheet() has but a single parameter: a single string containing every property of the stylesheet. This single parameter is encased with double brackets as there may be a string within a string. In our example, we have only provided a single property: background-color. Each property is separated from it's value with a colon.
Create a container
Vyzor
Blah Vyzor Blah

