Manual:Mudlet User Interface
Mudlet User Interface
This pages describes some of the various windows you will interact with while using Mudlet.
Connection Window
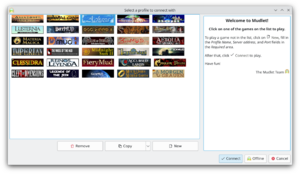
The connection dialog is the first screen you will be greeted with when starting Mudlet. This window is how you set up your initial connection parameters and begin your connection. Many elements of this window have Tool-Tip text displayed on-hover with more information related to each element or control.
![]() Note: The first time Mudlet is run, some options cannot be edited until you create your first new profile or after you start your first game.
Note: The first time Mudlet is run, some options cannot be edited until you create your first new profile or after you start your first game.
Pre-Configured Games
In the left of the window, you will notice a list of several MUD games. To play them, select one from the list and click the "Connect" button.
New Connections
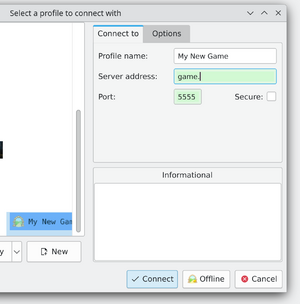
If you're using Mudlet with an unlisted game or for other telnet services, you'll want to click on the "New" button.
To set up your new connection profile, enter a Name for the profile. Next enter your connection address and port. If your game supports authentication you can either enter those credentials or do authentication another way via scripting.
![]() Note: Connection parameters cannot be edited while a connection is in progress for a selected profile.
Note: Connection parameters cannot be edited while a connection is in progress for a selected profile.
Secure Connection (TLS)
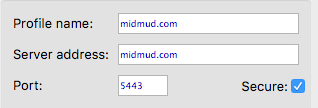
To connect to a game securely, tick the 'Secure' box in the profile connection settings:
The game server must support a secure (TLS, previously known as SSL) connection in order for this to work, and this feature is only available from Mudlet 3.17 forward.
If you are a game admin/developer, check out our sample configuration page or this example of a TLS proxy using nginx for some examples on how to setup a secure connection for your game.
Automatic Login
If your game takes in the characters name first and the characters password afterward, Mudlet can automatically login for you. To make use of this, put the name and password into the Connection information for your profile.
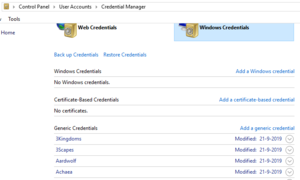
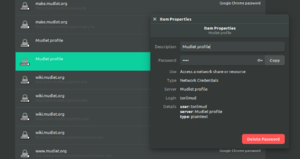
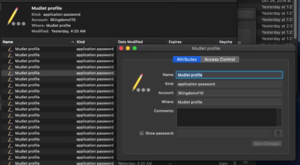
By since Mudlet 4.2, all passwords by default are stored securely in the computers credential store - which means you can't just open up the file with the password and look at it. When the password is stored securely on the computer, you can find it in the credential manager - see screenshots on the left for Windows/Linux/macOS.
The drawback of storing the password on the computer itself, however, is that if you use cloud sync for your profiles - the password won't the syncronised. You can go to Special Options in settings and change the password to be stored within the profile to make that work, if you'd like the password to be portable but visible in plaintext.
Discord Rich Presence
Since version 3.14 forward, Mudlet supports Discord Rich Presence integration for games using GMCP.
This feature can only be enabled on the pre-configured games which currently also support the feature. For more information, read about Discord GMCP
Game admin: adding your game to Mudlet
If you're a game admin who'd like to add your game to Mudlet by default, see here on how can you list your MUD.
Profile Preferences
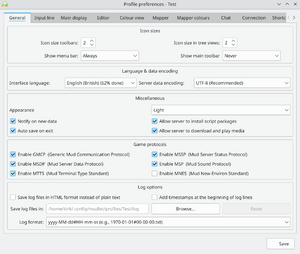
The Preferences windows (default key: Alt+P, or accessible from the top toolbar) allows you to modify options for each individual profile you create. You can enable/disable protocols, change word wrapping, fonts selection and many other settings. Most options are self-explanatory, but also have a tooltip with further information on what the options does.
Some options requiring further explanation are listed here;
| Preferences Tab | Option | Information |
|---|---|---|
| Colour view | BOLD is bright | Some MUDS use bold formatting codes to enable bright colours instead of actual bold formatting, this option allows this occur. |
Script Editor
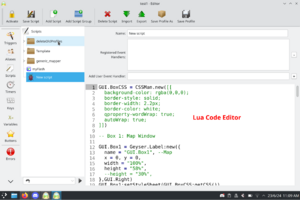
The Script editor screen (default key: Alt+E) provides access to Mudlet's automation features such as; triggers, aliases, scripts, timers, keybindings, variables and buttons. It also has an error console, statistics generator and debug console.
Lua Code Editor
Edit Lua scripts in the large code editor found in the bottom right section of the Script Editor. Mudlet runs Lua 5.1 and can access any Lua libraries install on your system. The API can be found here.
Editor shortcuts
The following shortcuts are available in the Lua code editor:
| Navigation shortcuts | |
|---|---|
| Ctrl+Tab | Focus next section |
| Ctrl+Shift+Tab | Focus previous section |
| Ctrl+S | Save current item (trigger, alias, etc.) |
| Ctrl+Shift+S | Save complete profile |
| Ctrl+1 | Show trigger editor |
| Ctrl+2 | Show aliases editor |
| Ctrl+3 | Show scripts editor |
| Ctrl+4 | Show timers editor |
| Ctrl+5 | Show keys editor |
| Ctrl+6 | Show variables editor |
| Ctrl+7 | Show buttons editor |
| Ctrl+8 | Show error log console |
| Ctrl+9 | Display statistics in main window |
| Ctrl+0 | Open central debug console window |
| Selection shortcuts | |
|---|---|
| Ctrl+A | Select all text |
| Ctrl+Left click | Add cursors |
| Ctrl+Alt+Up | Extend custors up |
| Ctrl+Alt+Down | Extend custors down |
| Esc | Switch to one cursor |
| Ctrl+D | Select words at the cursor |
| Ctrl+L | Select next lines |
| Ctrl+Shift+L | Select previous lines |
| Ctrl+F | Opens the script editor's FIND dialog. |
| F3 | Moves to the next FIND result. |
| Shift+F3 | Moves to the previous FIND result. |
| Editing shortcuts | |
|---|---|
| Ctrl+] | Indent right |
| Ctrl+[ | Indent left |
| Ctrl+Shift+D | Duplicate |
| Ctrl+/ | Toggle selection comment |
| Alt+Backspace | Delete rest of the word left |
| Ctrl+Backspace | |
| Shift+Backspace | |
| Alt+Delete | Delete rest of the word right |
| Ctrl+Delete | |
| Shift+Delete | |
| Ctrl+R | Toggle read-only |
Mapper
The mapper window has its own dedicated page available here.
